

How to run a Strapi app using ngrok on Google Cloud Shell
How to setup a Strapi development environment in Google Cloud Shell using Ngrok


Introduction
In this tutorial, you will learn how to install Strapi and run it on Google Cloud Shell.
After going through this tutorial, you will be able to use test and use Strapi on Google Cloud Shell. You will use a service called ngrok to help with previewing your app. You will effectively have an online testing environment for your Strapi app.
What is Strapi?
Strapi is the leading open-source headless Content Management System (CMS). It is 100% Javascript, based on Node.js, and used to build RESTful APIs and GraphQL. It also has a cloud SAAS, ☁ Strapi Cloud ☁ - a fully managed, composable, and collaborative platform to boost your content velocity!
Strapi enables developers to build projects faster with a flexible and customizable platform for managing content. Check out the Strapi Quickstart guide for a brief intro.
One of the benefits of Strapi is that you can bootstrap an API in a matter of seconds.
What is Ngrok?
Ngrok is an API-first ingress-as-a-service that simplifies connectivity, security, and observability for applications. It allows users to put their apps on the internet, connect to networks without complex configurations, and protect and scale their services with global network acceleration and load balancing. Ngrok is available as a single executable with no dependencies and can be used for both development and production environments.
Ngrok in this tutorial will help us preview the Strapi Admin Interface on port 1337. Port 1337 is a restricted port on Google Cloud Shell, so having access to it is quite handy. Also, ngrok will help us not meddle with CORS settings in the Strapi app.
What is Google Cloud Shell?
Google Cloud Shell is a free online development and operations environment accessible from any web browser. It provides command-line access to a Linux-based virtual machine instance. This machine comes preloaded with utilities and an online code editor with support for popular programming languages.
Cloud Shell offers a Virtual Machine Instance with the following features:
2 CPUs/4 CPUs
8GB/16GB of RAM
5GB of persistent disk storage in your
$HOMEfolder50 hours of weekly access
All in all Google Cloud Shell is a suitable environment to test out a Strapi app, especially if you are mobile.
Prerequisites
Before we begin, you need the following:
Any Chromium-based browser
If you are in a rush, you can use the GitHub repo for this tutorial:
Step 1 - Launch Google Cloud Shell
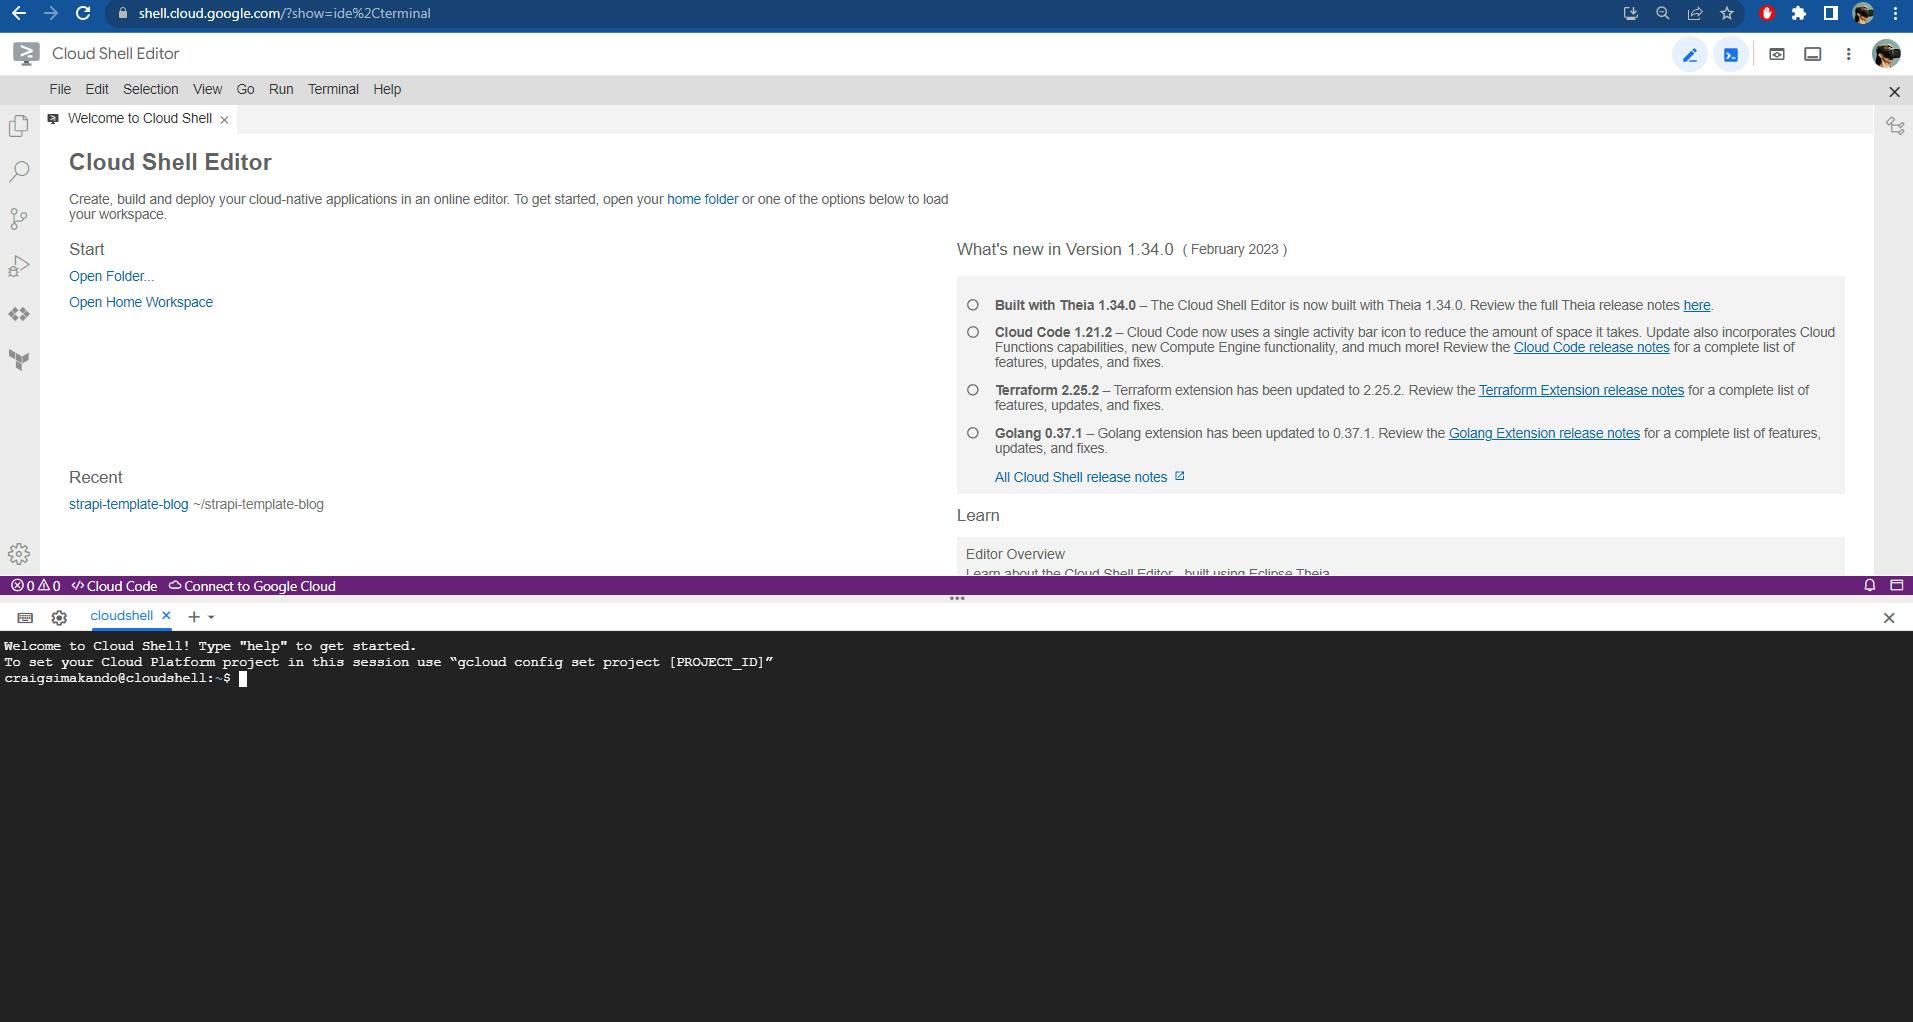
In your browser, log in to your Google Account and open up the Google Cloud Shell by visiting shell.cloud.google.com. This launches your Google Cloud Shell and you will see a window split into two with the Cloud Shell Editor on top and the terminal on the bottom.
In the terminal, you will see the following message, “Welcome to Cloud Shell! Type “help” to get started.”
Step 2 - Download Ngrok
To download ngrok, you first need to navigate to its official website at https://ngrok.com/. Once you are on the website, click on the Get started for free button. This will take you to a page where you can sign up for a free ngrok account.
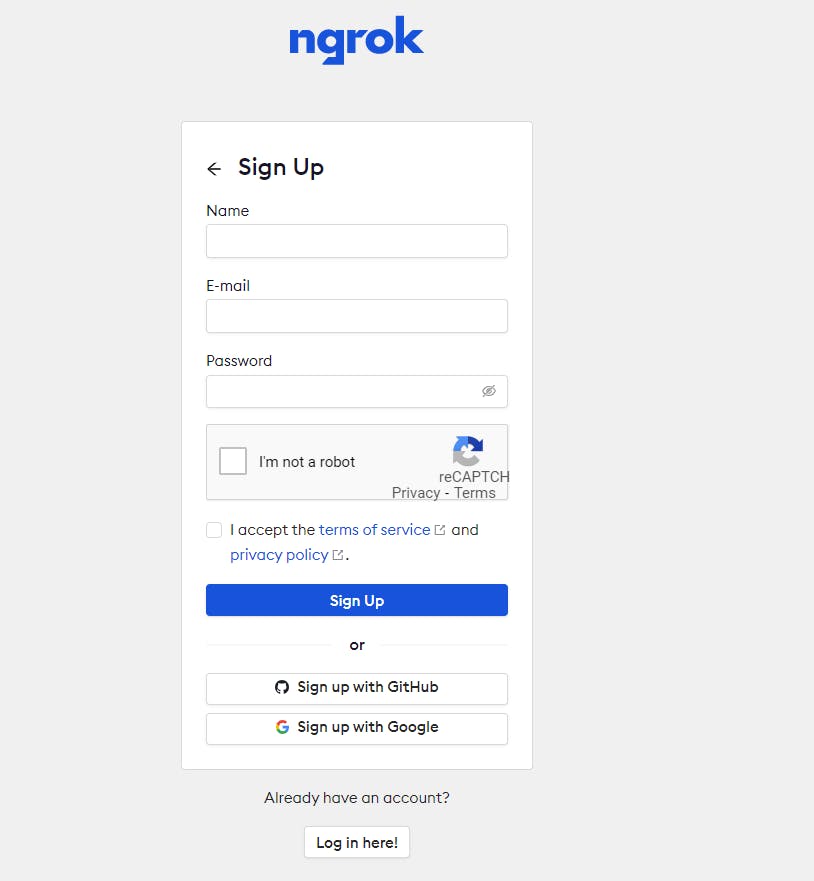
After you have signed up, you will be redirected to the ngrok dashboard. Navigate to the Setup & Installation page. From there, you can download the ngrok client.
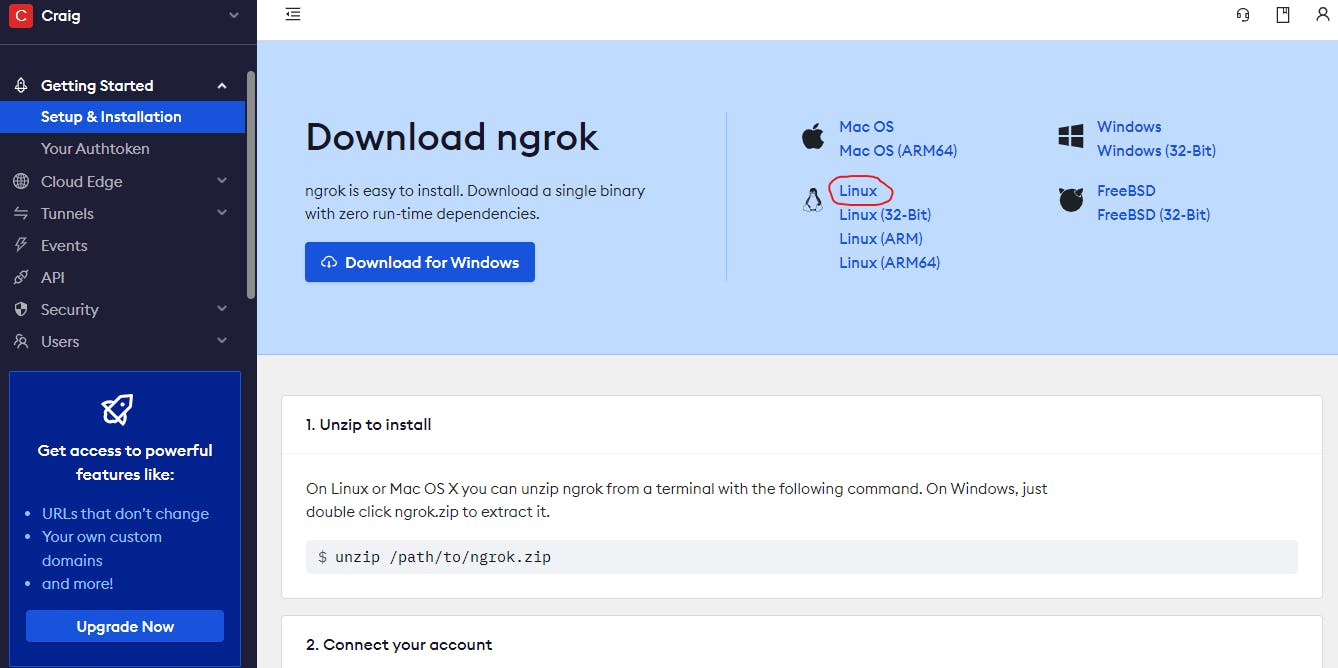
In our case, we want the Linux version of ngrok to use in Google Cloud Shell. Copy the link to the download. It should be similar to this - https://bin.equinox.io/c/bNyj1mQVY4c/ngrok-v3-stable-linux-amd64.tgz depending on the latest stable version available.
In your Cloud Shell enter the following command:
cd $HOME
wget https://bin.equinox.io/c/bNyj1mQVY4c/ngrok-v3-stable-linux-amd64.tgz
In a few seconds, the ngrok archive will be downloaded to your $HOME folder.
Step 3 - Install Ngrok
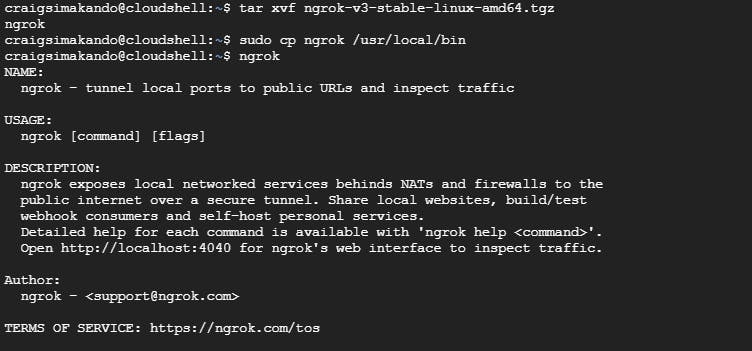
After downloading ngrok, you will need to extract it. use the following command:
tar xvzf ngrok-v3-stable-linux-amd64.tgz
This creates a folder named ngrok in your $HOME directory.
Add ngrok to your PATH to execute the ngrok command.
sudo cp ngrok /usr/local/bin
Type ngrok in your shell to confirm it’s working.
ngrok
You should get an output similar to this:
Now that ngrok is working, the next step is to connect your Ngrok account.
Step 4 - Connect Ngrok Account
Go to your Ngrok dashboard and navigate to Your Authtoken - ngrok. Copy your personal Authtoken.

Run this command to add your authtoken to the default ngrok.yml configuration file.
ngrok config add-authtoken <Authtoken>
NOTE: Replace with your specific ngrok account Authtoken
This will authenticate the ngrok agent you downloaded in Step 3. It will also grant you access to more features and longer session times.
Step 5 - Create Strapi App
Run the following command to install Strapi using the quickstart feature.
cd $HOME
npx create-strapi-app backend --quickstart --no-run
This creates your Strapi app in the folder named backend. The quickstart flag sets up your Strapi app with an SQLite database. The no-run flag means the Strapi server won't start automatically after installation has finished.
After installation completes, you will need to edit a few files to make Strapi work in the Google Cloud Shell environment.
Change the directory to the Strapi app folder, backend and edit the .env file.
cd $HOME/backend
vi .env
Edit the HOST variable so that it points to 127.0.0.1 instead of the default 0.0.0.0 .
# Edit Here
HOST=127.0.0.1
PORT=1337
APP_KEYS=rCP6kukt7QDB7lNmzB2/Cw==,GpcZnOOmXKmNfz3C2fwlBw==,zfDR/ILQOXf7EpYyGd7bpw==,spl+uU4yXK9eMd6Fm34yTw==
API_TOKEN_SALT=YVEhOqDRHQqfGdWxhfk0ew==
ADMIN_JWT_SECRET=ODcC3JA1CvGwBvHsiodVag==
TRANSFER_TOKEN_SALT=fyw04idj4UWiQxOoYooS7A==
# Database
DATABASE_CLIENT=sqlite
DATABASE_FILENAME=.tmp/data.db
JWT_SECRET=GXvDNchXHqcXvyB04uknJA==
Next, edit the config/server.js file so that the 'HOST' points to 127.0.0.1 instead of the default 0.0.0.0 .
vi config/server.js
module.exports = ({ env }) => ({
  host: env('HOST', '127.0.0.1'), // Edit Here
  port: env.int('PORT', 1337),
  app: {
    keys: env.array('APP_KEYS'),
  },
  webhooks: {
    populateRelations: env.bool('WEBHOOKS_POPULATE_RELATIONS', false),
  },
});
For more information, check out Strapi Server Docs.
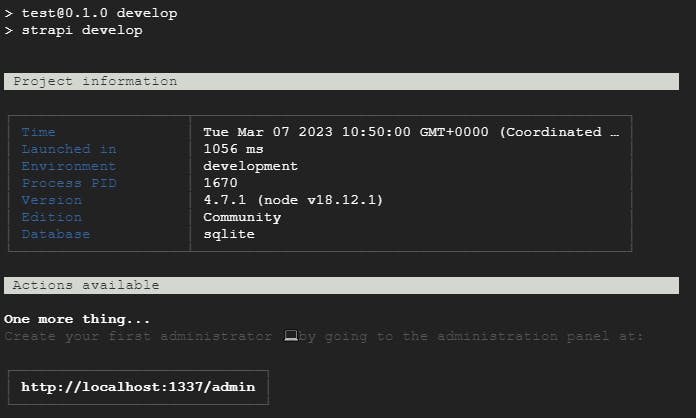
Next, build your Strapi app. (Make sure you're still in the backend directory)
npm run build
After the build completes, run your Strapi app:
npm run develop
This should start your Strapi app on localhost:1337 . You should see the following output in your terminal:
The next step requires ngrok for you to access Strapi's Admin UI in the browser.
Step 6 - Run Ngrok
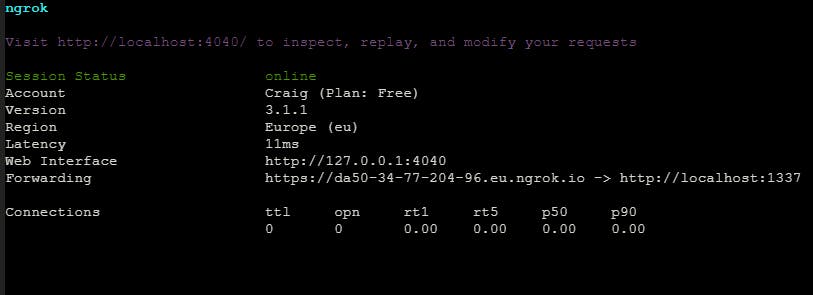
To connect to ngrok, open a new terminal tab by clicking the + icon in your Cloud Shell. Then run the following command:
cd $HOME
ngrok http 1337
This will start ngrok and create a public URL that you can use to access the Strapi app.
Step 7 - Open Strapi App
Now that Strapi is running and ngrok is configured to forward requests to your Strapi instance, it's time to open up the Strapi app in your browser. Open up the link you have been assigned by ngrok in your browser. It's in the form <unique-ngrok-subdomain>.ngrok.io. You will see the Welcome to your Strapi app page.
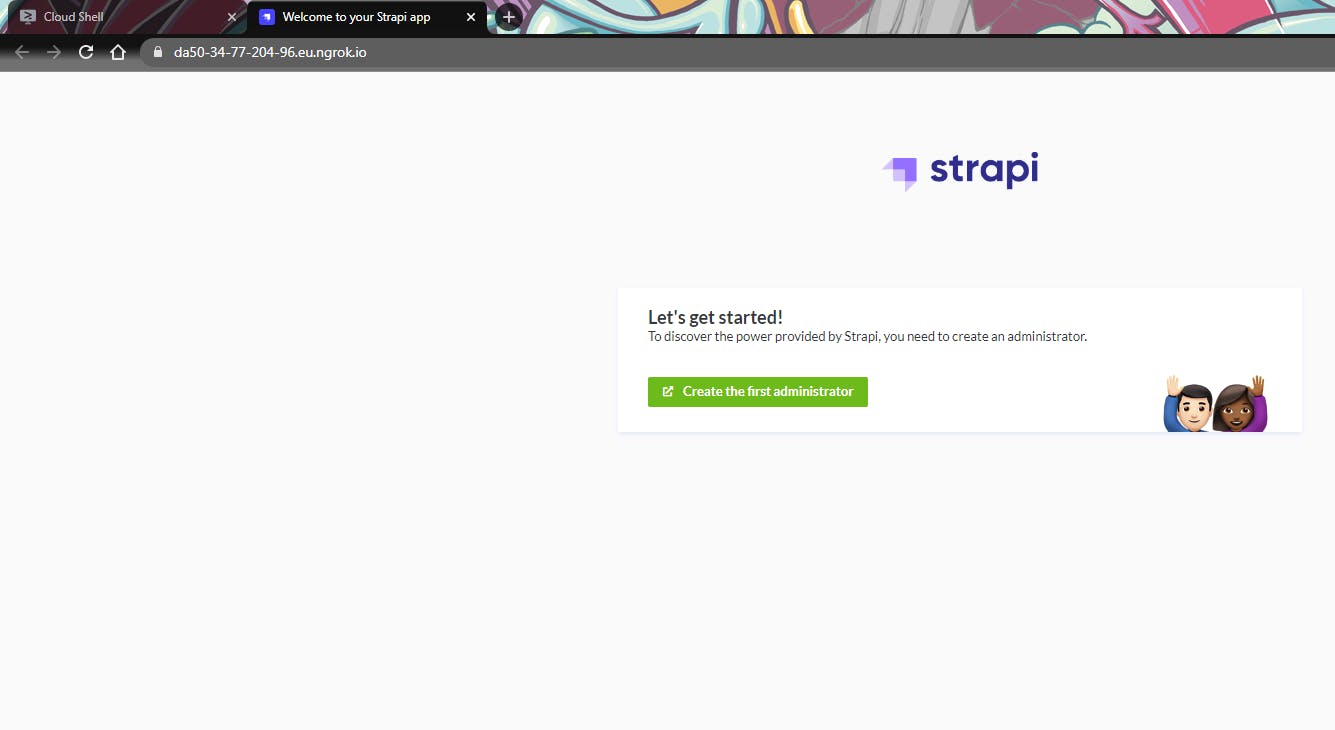
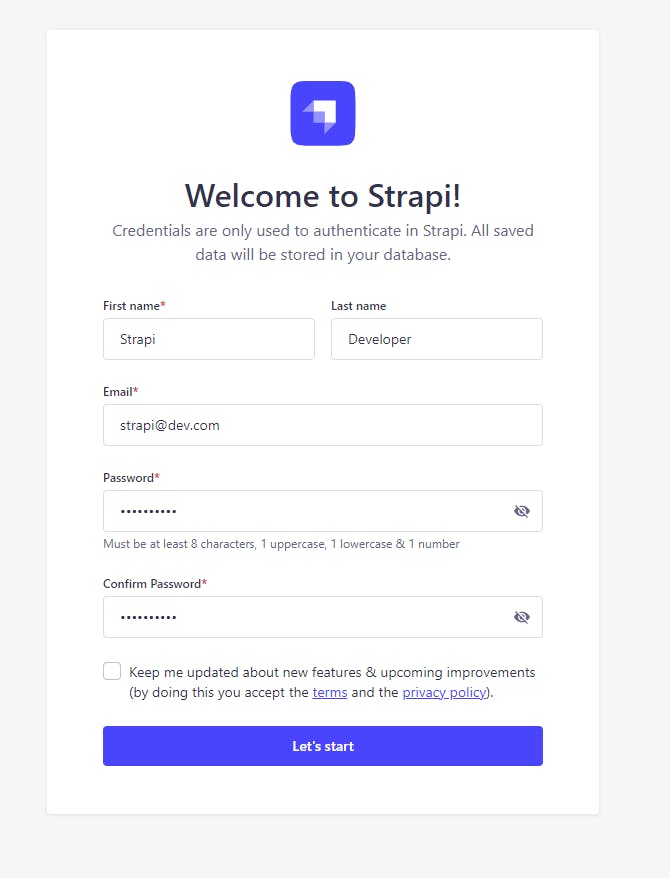
Click Create the first administrator button to register an Admin user for your Strapi app.
After registering your admin, you will be redirected to the Strapi Admin Dashboard.
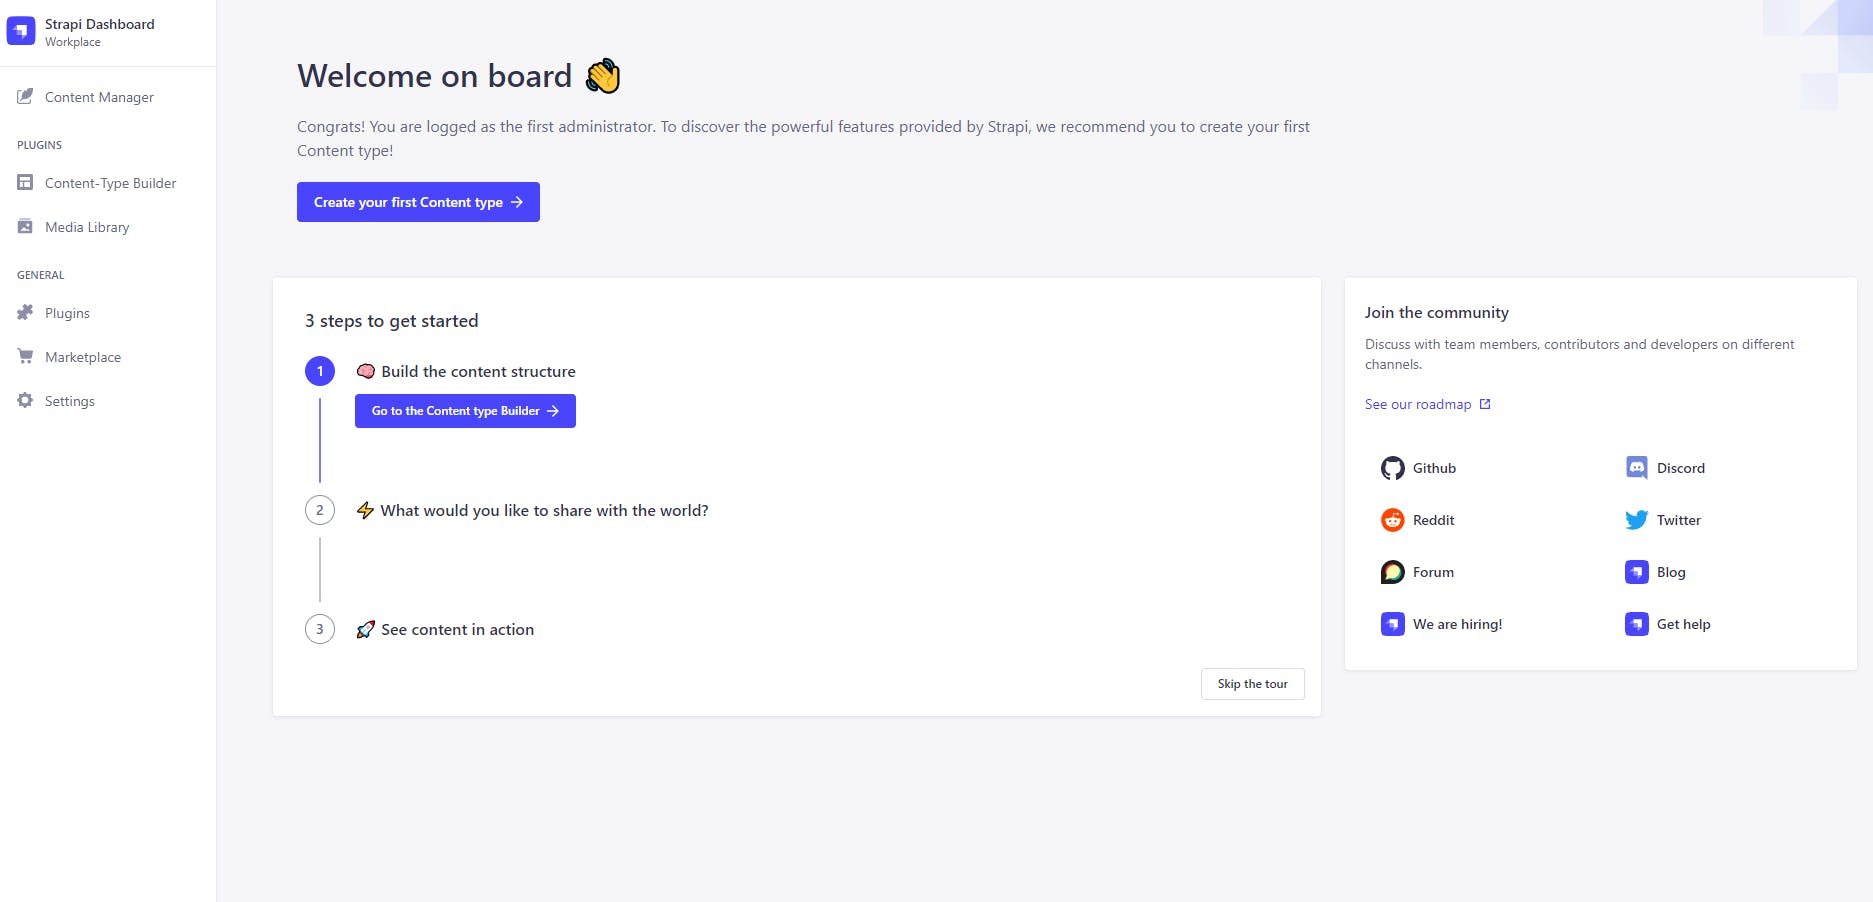
Here you can start creating collections and content for your Strapi app and test out your API when you're ready.
That's it.
If it is your first time working with Strapi, please check out Strapi's Quick Start Guide for a more in-depth tour.
Conclusion
In conclusion, this tutorial has provided you with a step-by-step guide on how to run a Strapi development environment in Google Cloud Shell using Ngrok. You have learned how to install Strapi, launch Google Cloud Shell, and install Ngrok.
You have also gained knowledge on what Strapi, Ngrok, and Google Cloud Shell are, and what they do. With this tutorial, you can easily create a testing environment for your Strapi app and preview it online using Ngrok.
Useful Links
Google Cloud Shell Documentation
If you have any questions or comments, feel free to leave them below.