


Introduction
In this tutorial, I will guide you on how to install and use Ngrok on Google Cloud Shell.
After going through this tutorial, you will be able to use Ngrok on Google Cloud Shell and make the web apps you run on the Cloud Shell public.
What is Ngrok?
Ngrok is a service that enables you to share local resources, such as a website, on the internet. It generates a URL that consists of a dynamic subdomain. For instance, if your website is only accessible locally through the address localhost:3000, like a Node website, Ngrok will generate a URL in the form https://<unique_subdomain>.ngrok.io that points to your locally hosted website.
What is Google Cloud Shell?
Google Cloud Shell is an online development and operations environment accessible from any web browser. It provides command-line access to a Linux-based virtual machine instance. This machine comes preloaded with utilities such as gcloud and kubectl, and an online code editor with support for popular programming languages.
Cloud Shell also includes pre-installed admin and development tools such as MySQL, Kubernetes, Docker, and Skaffold. It offers 5 GB of persistent storage and can be activated directly within Google Cloud documentation. Source control via Git is available in the code editor or command line. Cloud Shell allows for easy migration of source code between Cloud Shell Editor and local IDEs.
The Benefits of Google Cloud Shell
Free online development environment in your browser you can use to test and build projects
Powerful processor ( 2 cores or 4 cores Intel Xeon CPU)
Lots of RAM (8GB or 16GB)
Comes with a free editor based on Theia
The Limitations of Google Cloud Shell
The limitations of using Google Cloud Shell include:
Limited range of ports to use. (Use ngrok or ssh port forwarding to bypass this)
You can only preview one port at a time. (Use ngrok or ssh port forwarding to bypass)
Limited storage (5GB). (That’s more than enough for most projects though)
Lack of persistent installs. (That can be overcome by installing it from source in your
$HOMEdirectory, however, that will severely limit your storage capacity)Usage limit of 50 hours per week. (You can apply for more hours though)
How Ngrok fits in
Ngrok addresses some of the limitations of Google Cloud Shell. With Ngrok you can access restricted ports like port 80 as well as preview more than one port at a time in your cloud shell instance.
Prerequisites
Before we begin, you need the following:
Chromium-based browser
Step 1 - Launch Google Cloud Shell
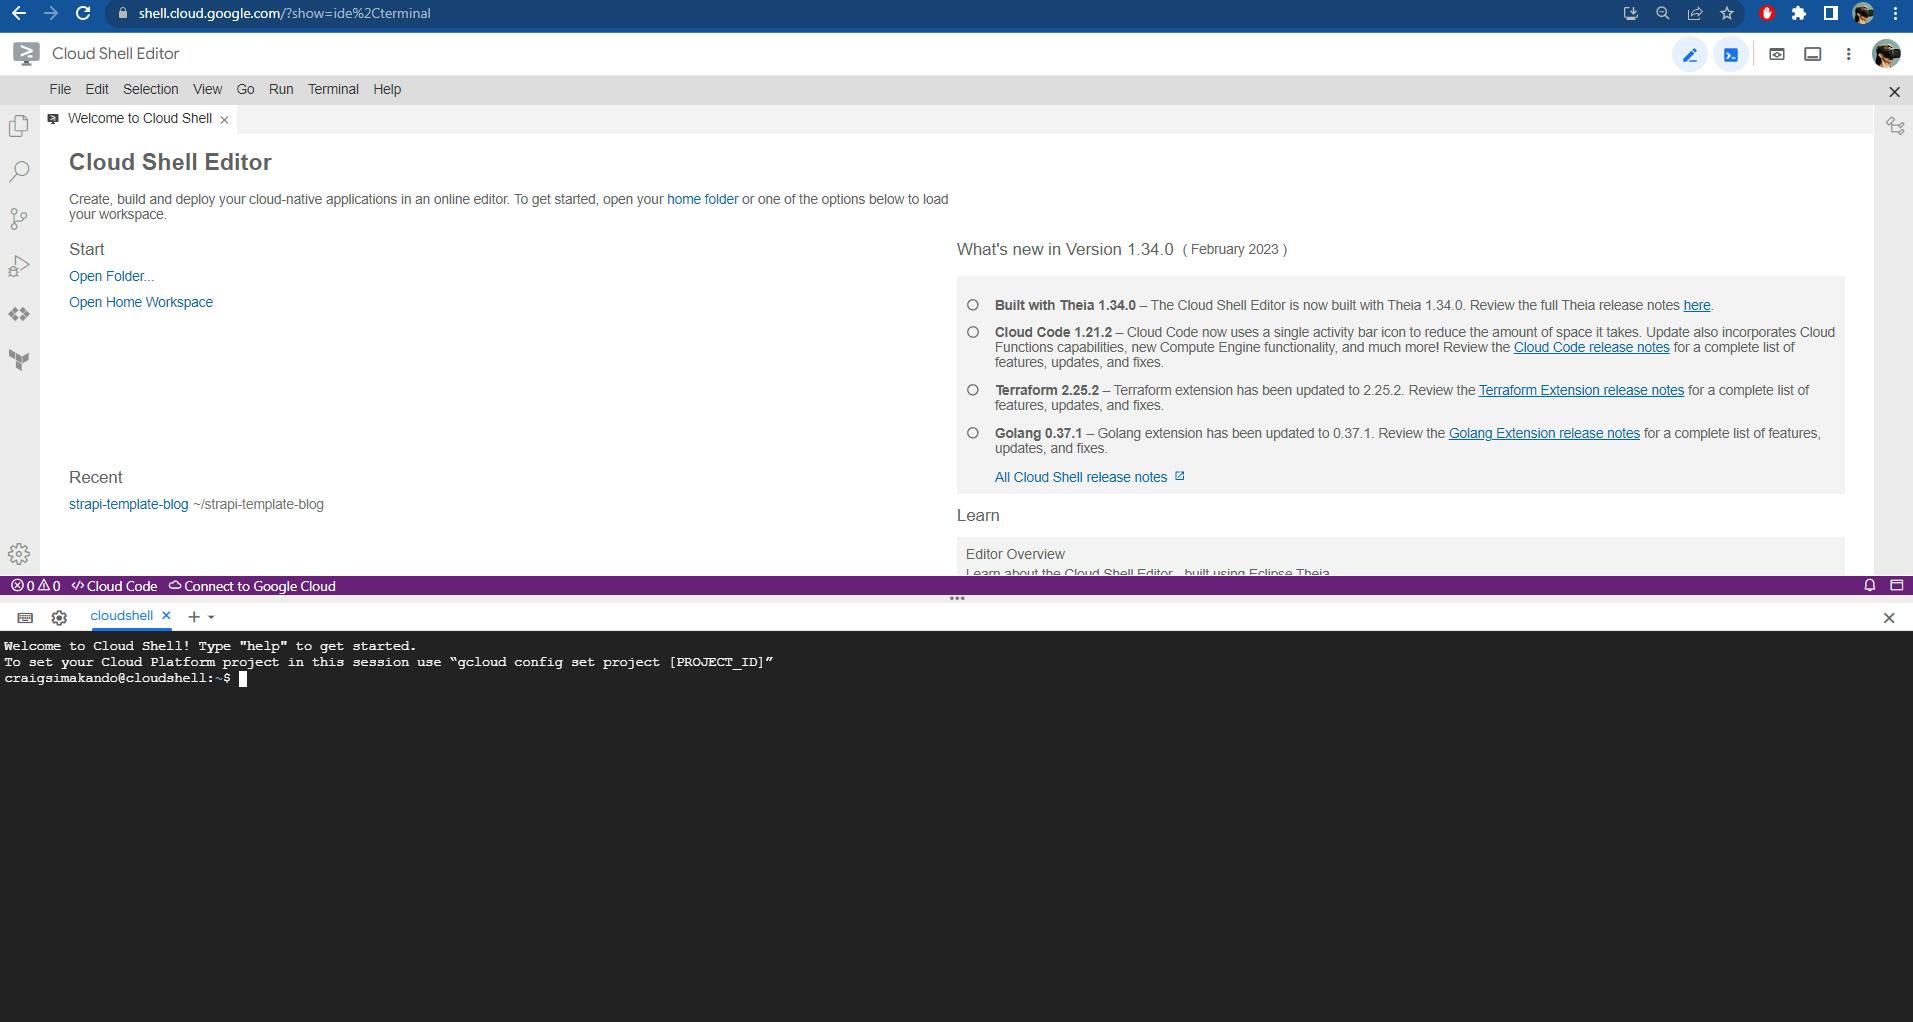
In your browser, log in to your Google Account and open up the Google Cloud Shell by visiting shell.cloud.google.com. This launches your Google Cloud Shell and you will see a window split into two with the Cloud Shell Editor on top and the terminal on the bottom.
In the terminal, you will see the following message, “Welcome to Cloud Shell! Type “help” to get started.”
Step 2 - Downloading Ngrok
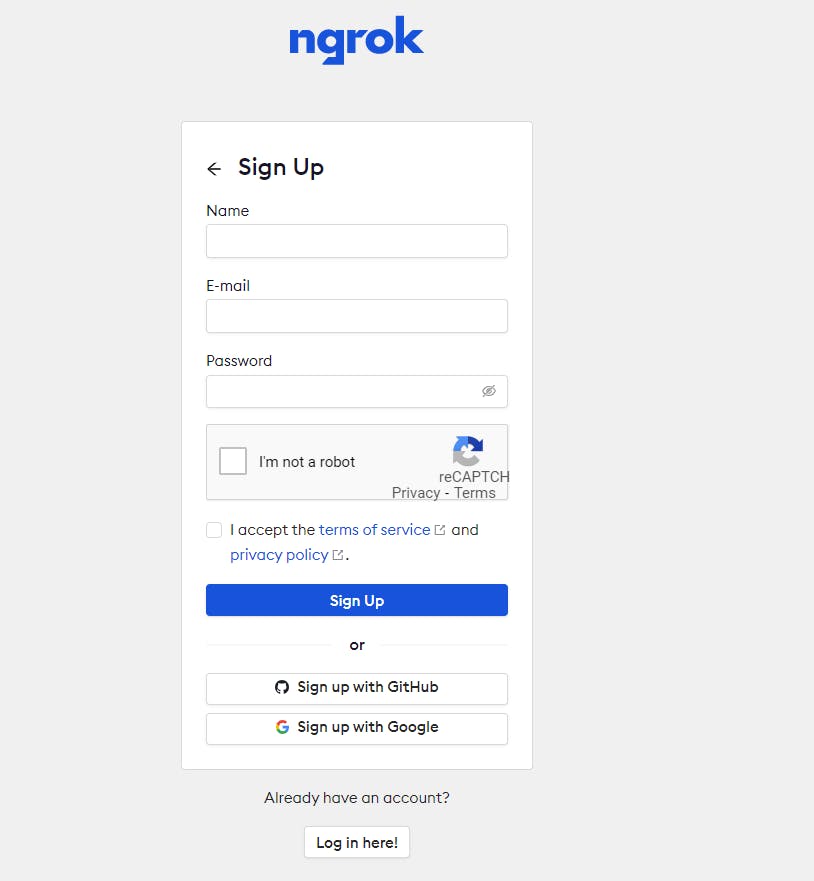
To download ngrok, you first need to navigate to its official website at https://ngrok.com/. Once you are on the website, click on the Get started for free button. This will take you to a page where you can sign up for a free ngrok account.
After you have signed up, you will be redirected to the ngrok dashboard. Navigate to the Setup & Installation page. From there, you can download the ngrok client.
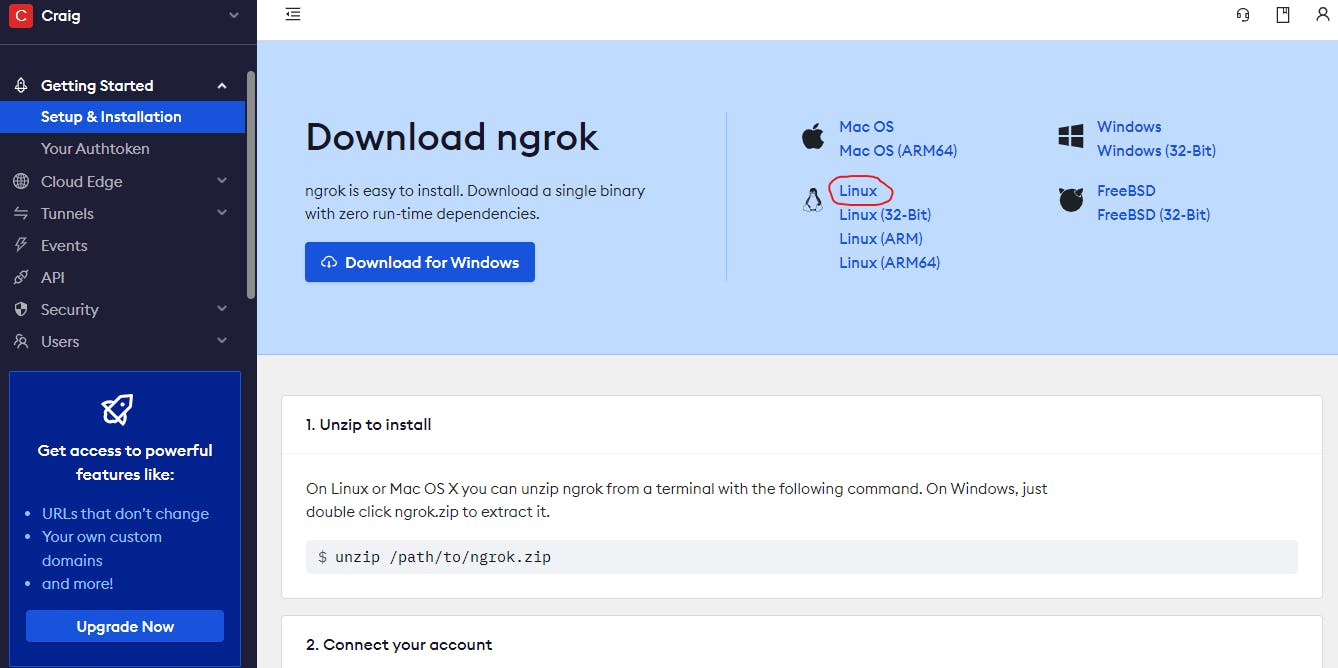
In our case, we want the Linux version of ngrok to use in Google Cloud Shell. Copy the link to the download. It should be similar to this - https://bin.equinox.io/c/bNyj1mQVY4c/ngrok-v3-stable-linux-amd64.tgz depending on the latest stable version available.
In your Cloud Shell enter the following command:
wget https://bin.equinox.io/c/bNyj1mQVY4c/ngrok-v3-stable-linux-amd64.tgz
In a few seconds, the ngrok archive will be downloaded to your $HOME folder.
Step 3 - Installing Ngrok
After downloading ngrok, you will need to extract it. use the following command:
tar xvzf ngrok-v3-stable-linux-amd64.tgz
This creates a folder named ngrok in your $HOME directory.
Add ngrok to your PATH to execute the ngrok command.
sudo cp ngrok /usr/local/bin
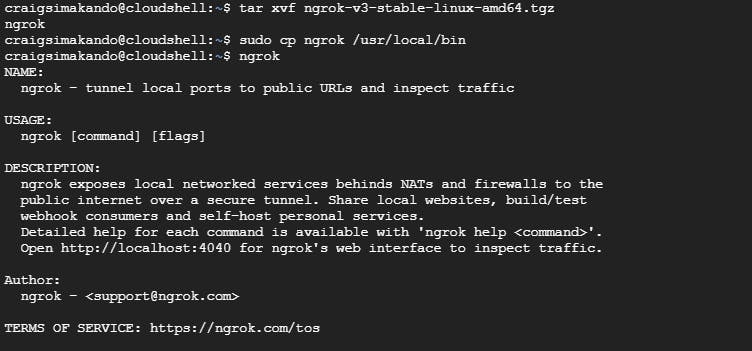
Type ngrok in your shell to confirm it’s working.
ngrok
You should get an output similar to this:
Now that ngrok is working, the next step is to connect your Ngrok account.
Step 4 - Connect your Ngrok account
Go to your Ngrok dashboard and navigate to Your Authtoken - ngrok. Copy your personal Authtoken.
Run this command to add your authtoken to the default ngrok.yml configuration file.
ngrok config add-authtoken <Authtoken>
NOTE: Replace with your specific ngrok account Authtoken
This will authenticate the ngrok agent you downloaded in Step 3. It will also grant you access to more features and longer session times.
Step 5 - Test Ngrok
To test ngrok we are going to see if works on a restricted port on Cloud Shell.
Run a simple Python HTTP web server on port 80 (restricted port) in your Cloud Shell using the following command:
cd `mktemp -d` \
    && echo '<html><body>Hello World</body></html>' >./index.html \
    && python -m http.server 80
You will receive, Serving HTTP on 0.0.0.0 port 80 (http://0.0.0.0:80/) . This confirms that your web server is running.
To connect to ngrok, open a new terminal tab by clicking the + icon in your Cloud Shell. Then run the following command:
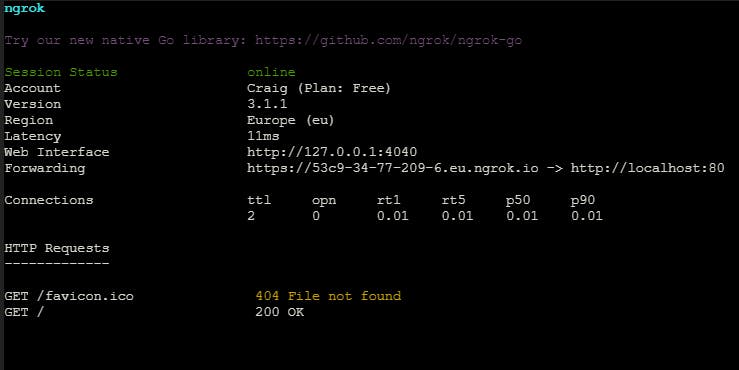
ngrok http 80
This will start ngrok and create a public URL that you can use to access the simple web server.
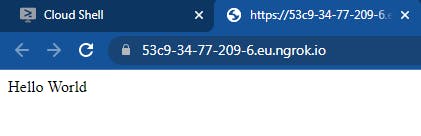
Visit the generated ngrok link in your browser. If all is working you should see the text “Hello World” in a blank page, as seen below:
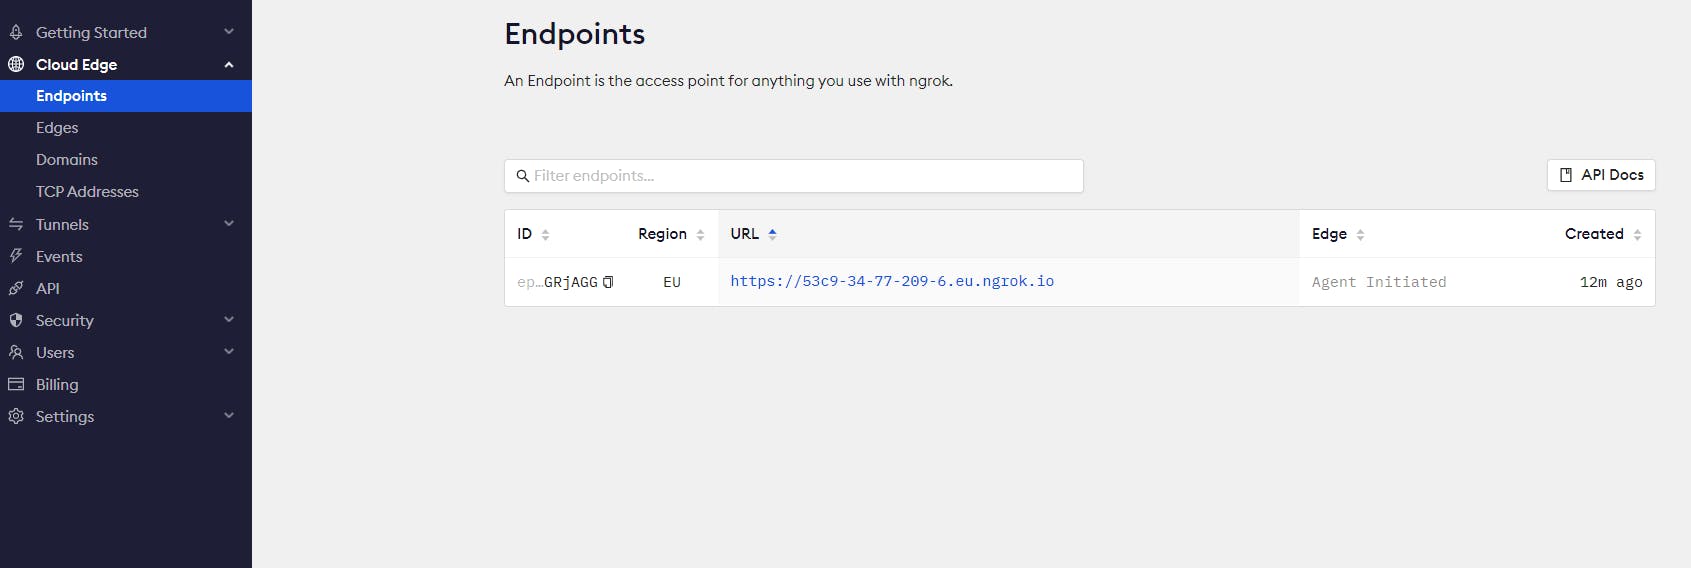
The running tunnels will be listed on the endpoints page of your dashboard.
Conclusion
Congratulations! You have successfully installed and run ngrok on Google Cloud Shell. You can now use ngrok to securely expose web apps you run on Google Cloud Shell to the internet.
Useful Links
If you have any questions or comments, feel free to leave them below.